In a nutshell
- 🌧️ Moisture sabotages baking: silica gel packs stabilise humidity so ingredients stay free-flowing, delivering even browning, predictable rise, and crisp textures—because even bakes start before the oven is on.
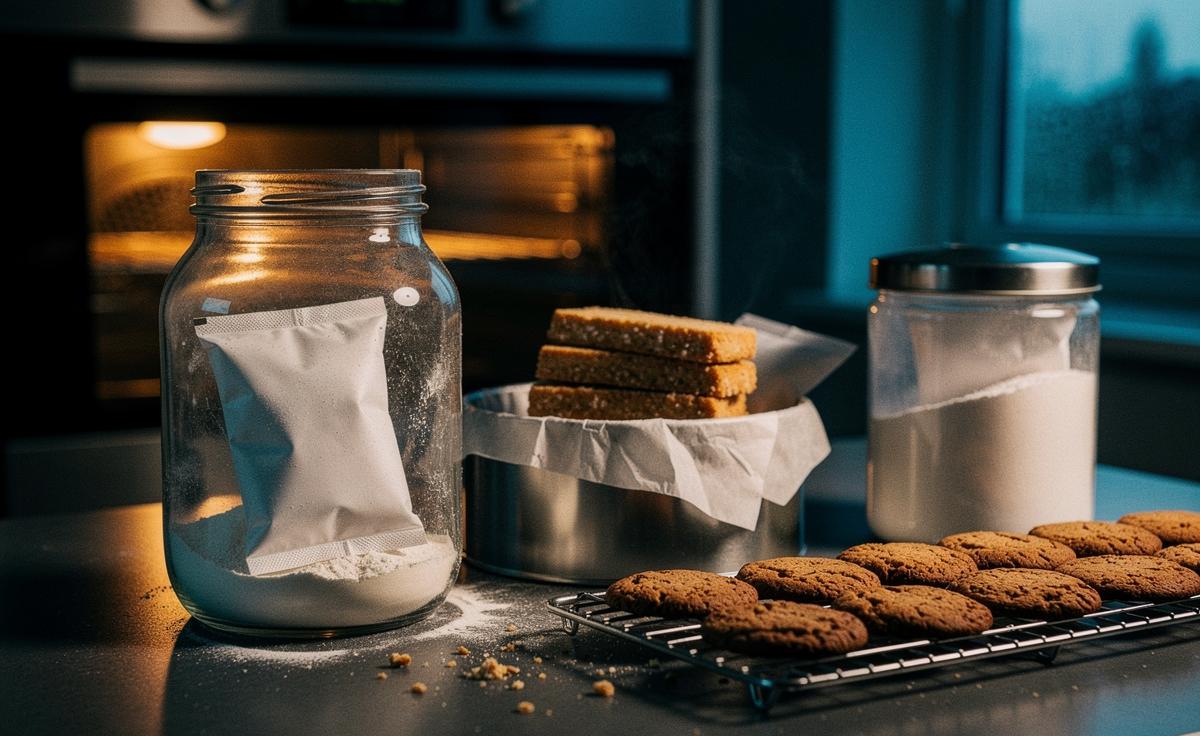
- 🧰 Smart usage (not in the oven): place food-safe sachets in airtight flour and sugar containers, tool boxes, and biscuit tins (under a liner) to prevent clumps, rust, and staling; never in the oven, never opened, and keep away from children and pets.
- 📦 Choosing the right pack: opt for food-safe or orange-to-green indicating beads, avoid cobalt blue-to-pink types; size by container volume; follow regeneration at 100–120°C for 1–2 hours—never microwave.
- 🔁 Workflow for consistency: store dry goods airtight with a sachet, temper ingredients in sealed containers to avoid condensation, cool bakes correctly, and tailor your humidity strategy for crisp vs chewy finishes.
- 📊 Tangible gains: fewer “soggy bottoms,” steadier timings, protected tools and decorations, and longer shelf-life during storage and transport—desiccants act as quiet insurance for even results.
Moisture is the quiet saboteur of home baking. One misty day can turn sugar clumpy, flour inconsistent, and biscuits limp before tea. Professional kitchens understand this, which is why they quietly rely on silica gel packs to stabilise humidity across ingredients, tools, and storage. These simple desiccant pouches don’t go in your cake tin; they work around the bake, creating conditions that produce predictable rise, even browning, and crisp textures. Think of them as a microclimate manager. Place them where air and ingredients meet, not in contact with food, and you’ll see fewer “soggy bottoms” and more uniform crumb. Used correctly, silica gel helps your oven’s heat do its job—consistently.
How Moisture Sabotages Baking Evenness
Humidity meddles with every stage of baking. Flour absorbs ambient water; its protein hydration shifts, altering gluten development and batter viscosity. Sugar is hygroscopic too, drawing in moisture that leads to grainy buttercreams, spread-prone cookie doughs, and patchy browning. Even chemical leaveners misbehave when they’ve caked in a damp cupboard, releasing gas too early or too late. You end up with tunnels in cake, rubbery edges, or an uneven dome. Steam is wonderful when you want glossy choux; it’s ruinous when it condenses in your biscuit tin overnight. The result? Textures drift. Timings slip. Your “reliable” recipe grows moody.
Silica gel doesn’t change the recipe; it stabilises the environment. By pulling excess moisture from closed spaces, these pouches reduce clumping in dry goods, keep cocoa powder free-flowing, and preserve the integrity of meringue powders and sprinkles. That consistency upstream—before batter hits the tray—translates into consistent spread, colour, and lift. Even bakes start long before the oven is switched on. Manage humidity around ingredients and you’ll nudge heat to work evenly, not fight invisible damp patches.
Smart Ways to Use Silica Gel in the Kitchen (Not Inside the Oven)
Let’s get the cardinal rule out first. Never place silica gel packs inside the oven during baking. They’re for the surrounding workflow. Slip food-safe silica sachets (sealed, non-toxic types) into airtight containers of flour, icing sugar, and cornflour to keep them free of lumps. Tuck a pack in your piping tip caddy to prevent rust and in your biscuit cutter tin so edges stay sharp. After baking, cool biscuits on a rack, then store them in a lidded box with a sachet tucked under a paper liner—this reduces moisture migration and keeps that snap for days. Small trick, big payoff.
Transport matters too. Pop a sachet into containers carrying royal icing decorations, chocolate shards, or praline to stop bloom and stickiness. Store yeasted dough tools, thermometers, and digital scales with a pack to limit condensation damage. Do not open the sachets, and keep them away from curious pets and children. If you dehydrate fruit or bake granola, add a sachet to the cooled, sealed jar to resist sogginess in damp weather. The aim is simple: create stable mini-environments where humidity would otherwise creep in and flatten your work.
Choosing the Right Pack: Size, Type, and Regeneration
Not all desiccants are equal. For kitchen use, look for food-safe or “for dry goods” silica gel, ideally in sachets made from breathable, tear-resistant material. Non-indicating beads are excellent when you replace them on a schedule. If you need a visual cue, pick orange-to-green indicating beads (cobalt-free). Avoid older blue-to-pink types that use cobalt chloride. Sizing is straightforward: the bigger the container, the larger the sachet. A 10–20 g pack suits a small flour canister; larger bins may need 50–100 g. One sachet per sealed container is usually enough when you open it daily.
| Type | Best Use | Indicator | Regeneration Guidance |
|---|---|---|---|
| Non-indicating food-grade | Flour, sugar, spice tins | None | Low oven 100–120°C, 1–2 hrs |
| Orange-to-green indicating | Tool boxes, biscuit storage | Safe visual change | As above; remove when colour resets |
| Reusable canisters | Large proofing cupboards, pan drawers | Window indicator | Manufacturer’s cycle; often plug-in |
| Blue-to-pink legacy | Not recommended in kitchens | Cobalt chloride | Replace with safer alternatives |
Regenerate only when the kitchen is cool and free of food prep, placing sachets on a tray in a low oven or dehydrator per the maker’s instructions. Never microwave silica gel, and do not exceed recommended temperatures. Label and date your packs; consistency thrives on routine.
Workflow Tips for Consistent Bakes at Home and in Small Bakeries
Set your stage. Store dry ingredients in airtight containers with a small silica gel pouch and a note of the last refresh. Before mixing, bring everything to room temperature in the sealed container so condensation can’t form on cold flour or nuts. Pre-line tins, then keep them dry—stash your parchment rolls and cake boards with a sachet to prevent warping. Mix, portion, and chill doughs as your recipe requires; the goal is steady hydration rather than last-minute moisture swings caused by a humid kitchen or a rainy window sill.
After baking, control the cool. Move products to a wire rack in a draft-free spot. For crisp bakes, transfer to a lidded box with a desiccant beneath a sheet of baking paper once steam has stopped rising. For chewy cookies, keep packs out of the main container and only use them in the cupboard where the tin lives, so the ambient air stays drier but the biscuit tin’s microclimate remains slightly soft. Match the humidity strategy to the texture you want, not a one-size-fits-all rule. Small details, big uniformity. That’s how you bake evenly, day after damp day.
Baking consistency isn’t luck; it’s logistics. By taming humidity around ingredients, tools, and storage, silica gel packs help your heat deliver the same result on Tuesday as it did on Sunday. They protect flavour, preserve crunch, and keep finishes flawless during transport. Use the right type, refresh on schedule, and keep them out of the oven during the bake. Think of desiccants as quiet insurance for texture and timing. Ready to try a humidity-first workflow on your next batch and see which element of your routine benefits most from a drier microclimate?
Did you like it?4.5/5 (28)