In a nutshell
- 🥔 Potato peels act as a gentle abrasive while their starch fills micro-pores, creating a temporary polish that primes cast iron for stronger oil polymerisation.
- 🔧 Step-by-step: warm pan, scrub with fresh potato peels (flesh side), wipe slurry, dry on hob, apply an ultra-thin coat of rapeseed oil, then bake upside down at 200–230°C for 60 minutes and cool in the oven.
- ⚠️ Avoid common pitfalls: too much oil (leads to tackiness), soaking (rust risk), and insufficient heat; mild soap is fine, but always dry quickly and re-oil lightly.
- 🛠️ Maintenance myths debunked: you don’t need flax; multiple thin coats and regular cooking win; peel scrub weekly, oil buff as needed, full seasoning monthly; also effective on carbon steel.
- ♻️ Low-waste and practical: turn scraps into a tool, improve non-stick performance and rust resistance, compost peels after use, and enjoy campsite-friendly care.
It sounds improbable: potato peels turning a dull skillet into a slick, black workhorse. Yet this old cook’s trick is grounded in kitchen chemistry, thrift, and a touch of gentle abrasion. Warm the pan, scrub with peels, then oil and bake. Simple. Effective. Behind the simplicity, starch adheres to microscopic pores, smoothing them before oil polymerisation locks everything down. The result? A tougher, more even seasoning layer that resists sticking and rust. Waste becomes a tool, and your pan becomes a pleasure to cook with. Here’s how and why it works, plus the pitfalls to dodge if you want a finish that gleams like on day one.
Why Potato Peels Work on Cast Iron
When you rub warm cast iron with fresh potato peels, two things happen at once. The peel’s fibrous skin acts as a micro-abrasive, lifting oxidation and stubborn food films without gouging the existing seasoning. Meanwhile, the starch granules in the flesh smear and lodge in the iron’s microstructure. Heated slightly, they begin to gelatinise, forming a whisper-thin, glassy film that softens rough spots. That microfilm is the quiet hero: it evens the surface so your next oil coat bonds more uniformly. Cheap. Clean. Clever.
There’s also a chemical nudge at play. Potato starch contains amylose and amylopectin that, when warmed and spread thinly, create a temporary polish. Think of it as a primer before paint. It doesn’t replace oil-based seasoning; it prepares for it. The peel’s natural moisture helps mobilise the starch, while its texture provides controlled friction. Unlike steel wool, it won’t strip good layers unless you’re brutal. Starch also helps lift light metallic flavours that can cling after a high-heat sear, leaving a neutral surface ready for eggs or pancakes.
This method won’t rescue a pan that’s flaking or heavily rusted, but it will refine a sound base and brighten a tired surface. It’s particularly handy after fish or sugary sauces, when stickiness lingers. Minimal mess, minimal cost, noticeable difference.
Step-By-Step: Seasoning With Starch
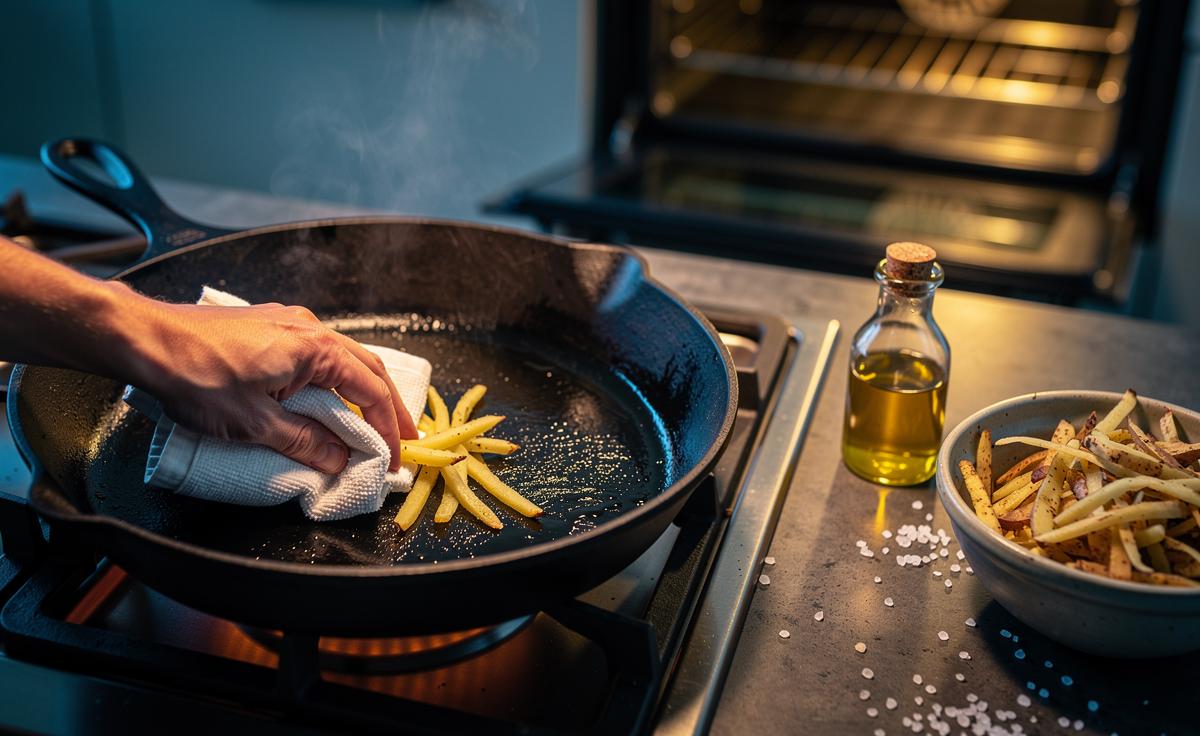
Begin with a pan that’s serviceably clean. Warm it on low heat for 3–4 minutes; warmth opens the metal’s pores. Using a handful of fresh potato peels (flesh side against the iron), scrub the cooking surface and lip in small circles. Add a pinch of coarse salt if there’s stubborn residue. Wipe away the slurry with a cloth. Repeat once if needed. Keep the pan only warm, not smoking: you want starch to smear, not burn.
Dry thoroughly on the hob until all moisture flashes off. While warm, apply ½ teaspoon of rapeseed oil (or another high smoke point oil). Buff hard with kitchen roll until the surface looks almost dry. This part matters; thick oil turns tacky. Place the pan upside down in a 200–230°C oven for 60 minutes, with a tray beneath to catch drips. Switch off the oven and let the pan cool inside. The starch-polished base now supports a tighter, more resilient polymerised layer.
| Stage | Heat | Duration | Outcome |
|---|---|---|---|
| Peel Scrub | Warm (no smoke) | 3–5 mins | Starch film, lifted residue |
| Drying | Low–medium hob | 2–4 mins | No surface moisture |
| Oil Buff | Pan warm | 1–2 mins | Ultra-thin, even coat |
| Oven Bake | 200–230°C | 60 mins + cool | Hard, glossy seasoning |
Care, Safety, and Common Pitfalls
The sins are simple: too much oil, too much water, too little heat. Thick coats puddle, and those puddles become gummy. Keep layers whisper-thin or they will turn sticky and flake later. Don’t soak cast iron. Ever. Water invites rust under the best-laid seasoning. If you must rinse, do it fast and dry over heat immediately. Avoid dishwashers. They’re seasoning assassins.
As for soaps, a small squirt of mild washing-up liquid won’t erase a good finish; that old rule is myth. What matters is how quickly you dry and re-oil. If you encounter light rust, scrub with peels plus a teaspoon of bicarbonate of soda, then follow the usual oil-and-bake routine. For rancid smells, strip back with hot water and a scrub, dry, and re-season twice. Ventilation helps during baking; polymerising oil can smoke.
Safety? Be sensible with heat and handling. Wear mitts when moving a hot pan, and place it on a stable trivet. Compost peels after use; they’re not for the bin if you can help it. Avoid green, sprouted peels in food, but they’re harmless as a scrub. Protect your seasoning by cooking often and cleaning light. That routine is the real secret.
Beyond the Peel: Maintenance and Myths
The peel trick is not a cure-all. Enamelled cast iron doesn’t need it; enamel is glass, not porous metal. For carbon steel woks and pans, though, the method shines. The starch polish helps those, too, especially after an intense stir-fry session that leaves sugar scorch. Oil choice? You don’t need exotic bottles. Neutral, robust, and affordable wins. Rapeseed, sunflower, or groundnut oils handle British oven temperatures without drama.
Another myth: only flaxseed oil gives a hard coat. Flax can work, but it’s brittle and fussy. In busy kitchens, durability comes from multiple thin coats and regular cooking, not one perfect bake. Try this cadence: peel scrub weekly, oil buff when the surface dulls, full oven seasoning monthly or after heavy stripping. Frequency beats intensity for a pan that behaves. When you see a satin sheen and eggs slide, you’ve nailed it.
Storage matters, too. Dry thoroughly, leave the lid off, and slip in a paper towel to absorb humidity. If the pan smells metallic after storage, a quick peel scrub freshens it, followed by a minute’s heat and a dab of oil. For campsite cooks, peels are a gift—free, biodegradable, effective. It’s bushcraft with benefits, and it keeps iron honest.
There’s quiet joy in restoring a pan without buying anything new. A handful of potato peels, a warm hob, a thin swish of oil—suddenly, last night’s stickiness is history and breakfast glides. The science is humble, the results are not. Try the starch polish the next time your cast iron feels rough, then bake on a featherlight coat for a finish that lasts. What dishes will you test first on that refreshed surface—and what other low-waste tricks are waiting in your kitchen scraps?
Did you like it?4.6/5 (22)