In a nutshell
- ✨ Olive oil restores shine fast by filling micro-scratches and improving light reflection; best on sealed or previously oiled wood, but avoid chopping boards due to potential rancidity.
- 🧽 Step-by-step: dust fully, test a hidden area, apply a tiny amount with the grain, wait 2–5 minutes, then buff until dry; fix streaks by rebuffing or a light wipe with mild soapy water.
- 🛑 When to avoid: unfinished tabletops prone to water rings, lifting veneer, antique French polish, and any food-contact surfaces; always do a 24-hour patch test.
- 🧰 Maintenance & fixes: dust weekly, reapply every 4–8 weeks, use an olive oil–white vinegar mix for grime, gentle heat for white rings, and add a thin beeswax polish layer for longer protection.
- ⚠️ Safety essentials: wipe drips to prevent slips and handle oily rags carefully—wash or dry flat to avoid self-heating; use minimal amounts for a clean, streak-free finish.
There’s a quiet thrill in rescuing tired timber with something pulled from the pantry. A drizzle of olive oil, a soft cloth, and five spare minutes can refresh sideboards, banisters, and bedside tables with surprising ease. The trick isn’t magic; it’s materials science wrapped in domestic common sense. Polish, buff, admire. Then put the kettle on. This simple method respects the wood’s character, hides fine scuffs, and restores a mellow glow that commercial sprays sometimes flatten. Used properly, a kitchen staple can stand in for boutique polishes while keeping fragrances and additives to a minimum. Here’s how to do it well—and when to pick a different bottle.
Why Olive Oil Works on Wood
Wood dulls for two reasons: micro-scratches scatter light, and dry fibres stop reflecting it evenly. Olive oil, rich in triglycerides (especially oleic acid), slides into these tiny valleys and levels the surface. That creates a smoother interface and a friendlier refractive index match, so the eye sees lustre again. It’s also mildly hydrophobic, so it helps repel fingerprints and a splash or two. Short story: it doesn’t “feed” wood, it temporarily fills and conditions it. The effect is immediate; longevity varies by finish and use.
On sealed timber—think varnish, shellac, or modern polyurethane—olive oil acts as a wipe-on dressing, not a penetrating treatment. That’s fine for shine. On bare or lightly oiled pieces, it will soak in, softening the look and deepening colour. The caveat is chemistry: plant oils can oxidise and develop odour over time, especially in warm, bright rooms. For chopping boards or butcher’s blocks, a food-safe mineral oil or a beeswax blend is wiser. But for a hallway console or oak picture frame that needs a quick lift before guests arrive, it’s a smart, gentle option.
Step-by-Step: From Dull to Gleam in Minutes
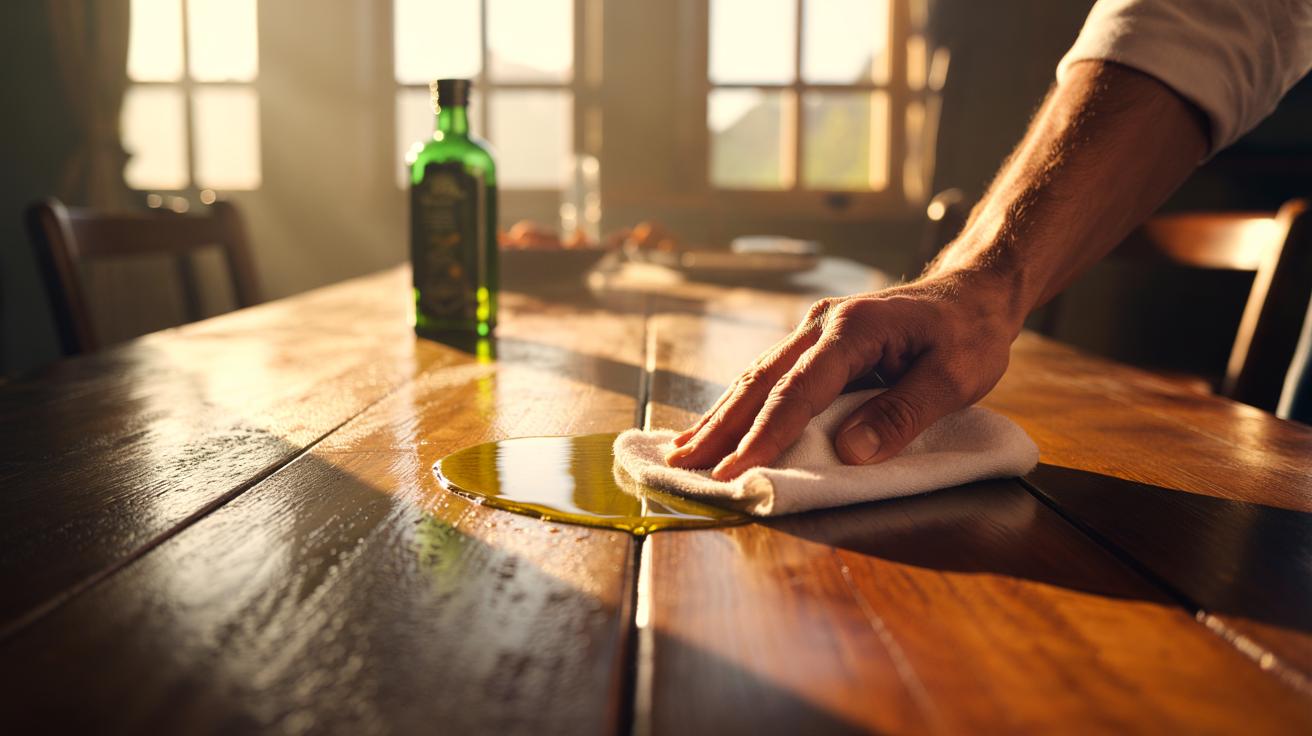
First, dust. Grit is the enemy of gloss. Use a microfibre cloth to remove loose particles so the oil can spread evenly rather than grind in. Decant a teaspoon of extra-virgin or light olive oil into a saucer. Light olive oil spreads faster; extra-virgin adds a slightly warmer tone. Test a hidden spot for colour shift. If the wood darkens more than you like, switch to a lighter grade or dilute with a neutral carrier such as white mineral oil.
Apply sparingly. For a bedside cabinet top, ½–1 teaspoon is usually enough. Work with the grain in slow, overlapping strokes, letting the cloth glide rather than drag. The aim is a whisper-thin film. Wait two to five minutes for the oil to settle, then buff with a fresh, clean cloth until the surface feels dry and lively. Streaks? You used too much. Add elbow grease or a touch of mild soapy water on a separate cloth, dry, and re-buff. For carved details, a soft natural-bristle brush helps distribute the oil without pooling in crevices.
Keep floors safe: any overspray or drips can create a slip hazard, so protect the area and wipe skirting boards carefully. Repeat monthly on high-touch pieces and quarterly on display furniture. The process is quick, quiet, and oddly satisfying.
When to Use It—and When to Avoid It
Olive oil shines when the goal is to revive sheen and mask fine scuffs on sealed or previously oiled furniture. It’s also helpful on waxed finishes between proper waxing, acting as a fast refresher before a deeper treatment. But there are hard stops. Don’t use it on unfinished tabletops that see water glasses—plant oils can accentuate water rings. Skip veneered surfaces with lifting edges; added moisture may creep under. Antique French polish needs specialist care; patch tests are mandatory. And kitchens? Reserve olive oil for cupboard exteriors, not chopping boards, where odour and flavour transfer can occur.
Consider this quick guide before you dip the cloth:
| Surface | Finish | Olive Oil Amount | Likely Result | Notes |
|---|---|---|---|---|
| Dining table (sealed oak) | Polyurethane | 1 tsp per 0.5 m² | Immediate gloss, richer tone | Buff thoroughly to avoid smears |
| Console (oiled walnut) | Danish oil | ½ tsp per 0.5 m² | Deeper colour, subtle sheen | Wipe off excess after 5 min |
| Cabinet doors | Waxed | Few drops per door | Warmer glow | Top up with wax monthly |
| Chopping board | Unfinished | Do not use | Risk of odour/rancidity | Choose mineral oil or board cream |
When in doubt, perform a small, 24-hour patch test behind or beneath the piece before committing to a full polish.
Care, Maintenance, and Quick Fixes
Routine keeps the shine honest. Dust weekly with a dry microfibre. Reapply olive oil when the surface looks flat or feels draggy—often every 4–8 weeks for busy tables, longer for display furniture. For greasy fingerprints or cooker-side grime, mix 3 parts olive oil with 1 part white vinegar, shake, and apply lightly; the mild acid cuts residue while the oil restores slip. Wipe dry immediately. Avoid soaking; water is wood’s quiet saboteur.
Quick fixes? A faint white ring from a warm mug can respond to gentle heat (a hairdryer on low) and a drop of oil, then a firm buff. Fine scratches disappear more readily if you tint a touch of oil with spent coffee grounds on dark woods; wipe off quickly to prevent staining beyond the mark. If shine fades unevenly, you likely applied too much in some areas—rebuff with a clean cloth until the surface feels uniformly dry. For a longer-lasting finish, follow olive oil with a thin layer of beeswax polish a day later; it locks in the glow and adds scuff resistance.
Store your polishing cloths in a sealed jar or wash promptly; air-dried oily rags can, in rare cases, self-heat—so flatten them to dry safely or launder immediately.
A bottle, a cloth, a few minutes. That’s all it takes to restore poise to weary wood and coax back the warm glow that makes a room feel finished. You’ll spend more time admiring than polishing, which is exactly the point. Used with restraint and common sense, olive oil is a nimble stand-in for pricier products, and it leaves room for a deeper wax or specialist treatment later. Ready to try it on a side table, or do you have a piece whose history begs for a different approach—what will you revive first, and how will you judge the result?
Did you like it?4.4/5 (27)