In a nutshell
- ✨ Fast shine: a simple baking soda paste cleans silverware in about 3 minutes using gentle abrasion and mild alkalinity.
- 🧪 Science check: tarnish is silver sulphide; the paste buffs it away safely, ideal for quick spot cleans without harsh chemicals.
- ⚖️ Mix and kit: aim for a 3:1 ratio (bicarbonate to water), apply with a microfibre cloth, and use a soft toothbrush for crevices—skip vinegar and salt.
- 🧽 Steps that work: degrease, apply with light pressure in circular strokes, brief dwell, then rinse, dry, and buff to a mirror finish.
- 🛡️ Smart care: store with anti‑tarnish strips and keep pieces dry; for heavy black tarnish, consider an aluminium foil bath or professional cleaning.
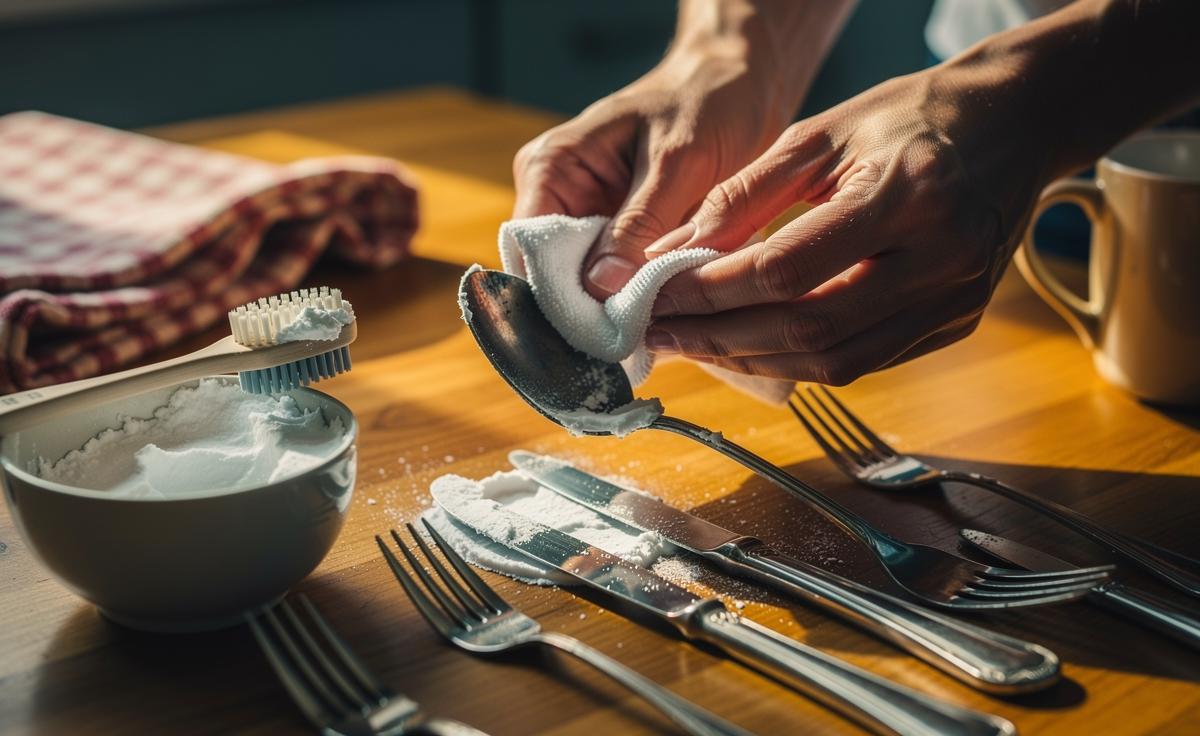
Silver loses its sparkle quietly. One day your favourite spoon gleams; the next, it’s clouded by a gloomy film. The good news: you don’t need specialist creams or a trip to the jeweller. A quick, kitchen‑cupboard rescue does the trick. Mix a simple paste of baking soda—or bicarbonate of soda, as we say in the UK—and water, and you can lift tarnish in as little as three minutes. No fuss, minimal cost, low waste. This method is gentle enough for most everyday silverware yet brisk enough to fit between boiling the kettle and setting the table. Here’s how and why it works, with the key ratios, precautions, and finishing touches for a showroom shine.
The Science Behind Tarnish and Baking Soda
Tarnish forms when silver reacts with sulphur compounds in air and food, creating a thin layer of silver sulphide that looks yellow, brown, or almost black. Eggs, onions, and urban air speed the change. The grime you see isn’t dirt; it’s chemistry. A baking soda paste counters that in two ways. First, the mildly alkaline bicarbonate (pH around 8) helps ease contaminants from the surface. Second, its ultrafine crystals provide a gentle mechanical polish, buffing away that silver sulphide without biting into the underlying metal.
Unlike the classic aluminium foil bath—an electrolytic process where sulphide is chemically reduced back to silver—this paste relies mainly on controlled abrasion plus light alkalinity. It’s safer for quick spot cleans and avoids soaking handles or glued components. Because household bicarbonate is a soft abrasive, it’s suitable for sterling and most silver‑plated cutlery when used with light pressure. It is not designed to strip heavy black tarnish in a single pass; for that, repeat the process or choose the foil method. Crucially, if your piece has a deliberate oxidised finish or antique patina, treat only the high points you want to brighten.
What You Need and the Perfect Paste Ratio
You only need two ingredients and a couple of soft tools. Use food‑grade bicarbonate of soda (aka baking soda) and tap water. Warm water speeds spreading but isn’t essential. Choose a microfibre cloth for application and buffing; keep a soft toothbrush for crevices. The ideal paste is thick enough to cling to spoon bowls and fork tines, not so runny it slips away. A rule of thumb: three parts powder to one part water, adjusted drop by drop until it spreads like toothpaste.
| Item | Ratio/Amount | Notes | Time Guide |
|---|---|---|---|
| Bicarbonate of soda | 3 tbsp | Fine, food grade | — |
| Water | 1 tbsp | Add gradually for paste | — |
| Contact and buffing | — | Light circular motion | 3 minutes total |
| Rinse and dry | — | Warm water, lint‑free towel | 30–60 seconds |
Keep the mix concentrated: a thin slurry cleans poorly and encourages over‑scrubbing. For a single place setting, 2 teaspoons bicarbonate with 1 teaspoon water will do. If cleaning a full canteen, scale up in the same ratio. Avoid adding salt or vinegar here—they belong to different methods and may etch finishes or attack glued handles. Prepare a second dry cloth solely for final polish; it prevents re‑depositing residue while you restore that crisp, mirror shine.
Three-Minute Method: Step-by-Step Cleaning
Begin with a quick rinse and a dab of washing‑up liquid to remove grease; dry lightly so the paste sticks. Scoop a small amount of your bicarbonate paste onto a soft cloth and work it over the silverware in short, circular strokes. Focus on areas of yellowing or grey haze. Use only the weight of your fingers—no pressing. Gentle pressure is faster than force, because it preserves the surface and avoids hairline scratches.
After 60–90 seconds of motion, let the paste sit for another minute on stubborn patches. For ornate patterns and hallmarks, flick a soft toothbrush through crevices, then smooth everything with the cloth again. Rinse under warm running water, turning the piece so all residue washes clear. Immediately dry with a lint‑free towel, then buff briskly with a clean microfibre until reflections snap into focus. Repeat the cycle on heavily tarnished zones rather than scrubbing longer in one go. Do not use this method on set stones such as pearls, opals, or turquoise; moisture and abrasion can damage settings or adhesives. For composite handles—bone, resin, wood—keep contact brief and avoid soaking.
Care, Pitfalls, and When to Use Alternatives
Silver stays brighter when it stays dry. After cleaning, store pieces in anti‑tarnish pouches or roll them in acid‑free tissue with tarnish‑absorbing strips. Keep rubber bands away—sulphur in rubber accelerates darkening. Rotate everyday cutlery; regular use and washing delay tarnish. Dishwashers? Acceptable for modern stainless‑handled items, but harsh for fine silver and glue‑set handles. Hand‑wash, dry immediately, and finish with a quick buff to lock in that polished look.
There are limits. If your item shows thick, blotchy black tarnish, the aluminium foil bath (bicarbonate + hot water + aluminium) can reverse sulphide chemically with less abrasion. Equally, if a piece is silver‑plated and thinning at the edges, keep paste polishing brief and infrequent to avoid revealing the base metal. When in doubt, test the underside for 30 seconds and inspect under bright light. Avoid pastes on deliberately oxidised jewellery, engraved darkened backgrounds, lacquered finishes, or museum‑grade antiques. For sentimental or high‑value pieces, a professional clean and protective lacquer may be the wiser investment—especially if you want long intervals between polishes.
In a world of overcomplicated hacks, a simple baking soda paste holds its own: fast, cheap, effective, and kinder to the planet than harsh polishes. Three minutes, a soft cloth, and a rinse—then dinner looks smarter and heirlooms feel loved. The trick is restraint: a firm but light touch, the right ratio, and meticulous drying to slow the next wave of tarnish. Master this routine and your silverware will keep its sparkle with almost no effort. What piece will you rescue first, and where might a brighter fork or ladle make the biggest difference to your table tonight?
Did you like it?4.4/5 (24)