In a nutshell
- 🧪 Science first: Toothpaste’s micro‑abrasives (e.g., calcium carbonate, hydrated silica) shear through crayon wax, freeing embedded pigment; surfactants carry debris away. It’s abrasion, not bleaching, and the grit level is hinted by RDA—whitening pastes are riskier on delicate paints.
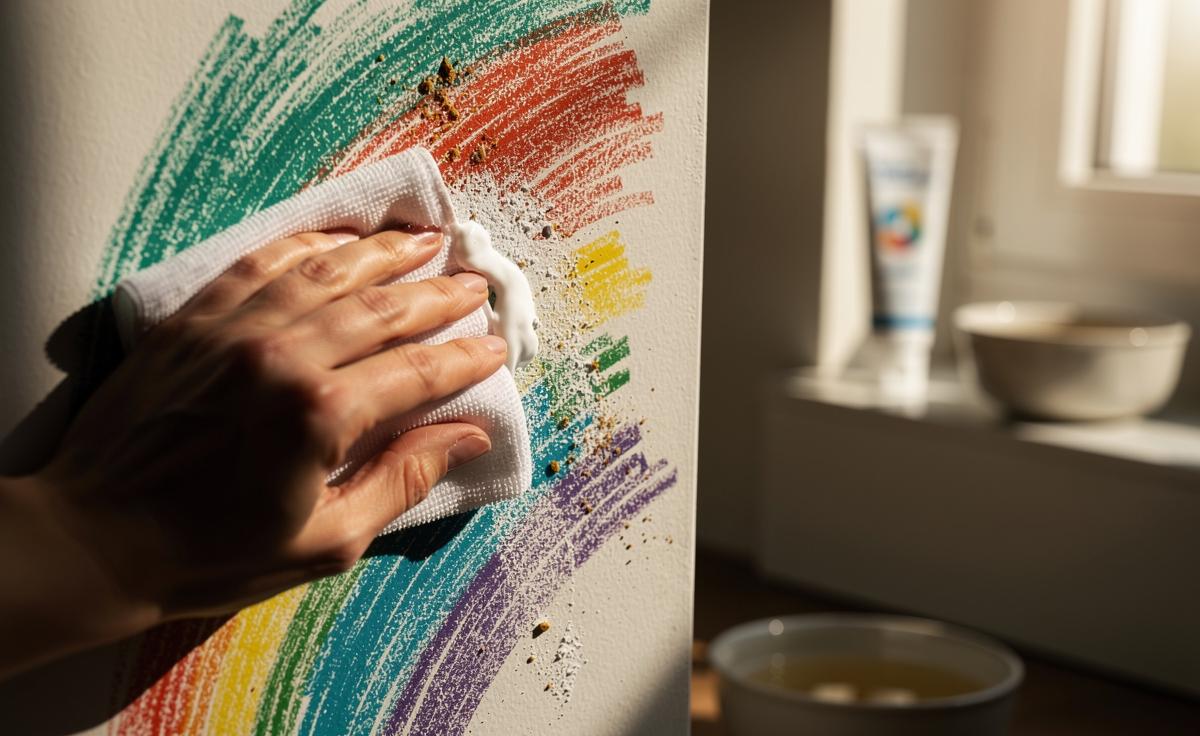
- 🧼 Method that avoids halos: Use white, non‑gel paste, a damp microfibre cloth, and light circular strokes for 10–20 seconds; rinse, repeat, then dry‑buff. Patch‑test first, keep the wall barely moist, and stop when colour transfer ceases to prevent burnishing.
- ⚖️ Pros vs. cons: Low cost, low VOCs, and precise spot cleaning vs. potential sheen change or fragrance residue. Alternatives: melamine sponges (fast but can burnish), isopropyl alcohol (may soften fresh paint), baking soda (gritty), and warm soapy water (gentle but weaker on pigment).
- 🧰 Pick the right paste and tools: Regular white (CaCO3) suits most walls; whitening (silica) for stubborn marks on durable finishes; gels for very delicate surfaces; avoid charcoal. Use microfibre, not stiff brushes; gloss trim tolerates slightly higher abrasivity.
- 🏠 Real‑world takeaways: On eggshell/satin, toothpaste is a prime first step; on matte, go gentler or soap‑then‑paste. A Leeds case cleared a 2‑metre mural in ~25 minutes—proof that controlled abrasion trumps brute force.
Parents, landlords, and anyone with a curious toddler knows the heart-sink of discovering a rainbow mural on freshly painted walls. Enter the low-tech hero hiding in your bathroom: toothpaste. Beyond the viral hack, there’s sound material science behind why this trick works—and how to use it without leaving dull halos. The secret isn’t mint or fluoride but micro-abrasives that gently sand away crayon wax and its embedded pigments. Done well, it’s fast, cheap, and safe for many paints. Done badly, it can scuff finishes. Here’s the chemistry, the workflow, and the strategic choices that turn a smear into a clean slate.
Why Abrasives Lift Pigment from Crayon Marks
Crayons are essentially paraffin wax loaded with pigment particles. The wax wets the wall’s micro-texture and anchors colourants in tiny valleys of paint. Toothpaste—especially the white, non-gel kind—contains abrasives such as calcium carbonate, hydrated silica, or dicalcium phosphate. These particles are engineered to scour dental plaque without cutting enamel; on paint, they act as a very fine sandpaper, shearing the wax film and releasing the pigment. Abrasion, not bleaching, does the heavy lifting. Meanwhile, mild surfactants help disperse loosened residue so it can be wiped away with water.
Two practical factors govern success: particle hardness and pressure. Silica-based formulas tend to be sharper on a microscopic level, speeding removal but increasing the risk of flattening a paint’s sheen. The industry uses Relative Dentin Abrasivity (RDA) to grade toothpastes; while designed for teeth, it’s a useful proxy for how “gritty” a paste will feel on paint. Lower RDA (under 70) typically gives more forgiving results, especially on matte or eggshell finishes. If the toothpaste is marketed as “whitening,” assume it’s more abrasive—and test first.
Step-by-Step Method: Toothpaste Without the Telltale Haze
Use a light touch and the right kit to avoid dull spots:
- Choose a white, non-gel toothpaste with no coloured beads or intense whitening claims.
- Start with a damp microfibre cloth; avoid paper towels that shed and scratch.
- Dab on a pea-sized amount; work in small circles over the crayon line for 10–20 seconds.
- Rinse the cloth, wipe clean, and repeat if needed. Keep the surface barely moist, not dripping.
- Finish with a clean, damp wipe, then dry-buff gently to restore the sheen.
- Always patch-test behind a frame or near a skirting board first.
In a Leeds rental I once cleaned, a hallway mural spanning two metres vanished in 25 minutes using a low-RDA paste and microfibre—no repaint needed. The only near-miss came from overworking a matte section, which began to look shiny. Stop the moment pigment stops transferring to the cloth; over-polishing risks burnishing the finish. If marks persist, alternate with a tiny drop of mild dish soap and warm water to soften wax, then return to the paste. Stacked techniques beat brute force.
Pros vs. Cons Compared with Other Fixes
Toothpaste’s edge is control. You can throttle abrasivity and pressure moment to moment—handy for unpredictable paint systems. Pros include low cost, zero VOCs, and pinpoint removal without saturating plaster. It also avoids the alkaline bloom that some stronger cleaners can leave on emulsions. Yet there are trade-offs: even mild abrasives can subtly shift sheen, especially on flat/matte finishes; fragrances may leave a faint scent; and coloured gels can stain.
Alternatives have their place. A melamine sponge (magic eraser) cuts faster but acts like an ultra-fine sandpaper, often burnishing matte paint. Isopropyl alcohol can lift some pigments but may soften fresh latex paints. Baking soda paste is a DIY abrasive with decent control but can be gritty. Warm soapy water softens wax but struggles with embedded pigment. The balancing act is simple: if your wall is durable and slightly glossy (eggshell, satin), toothpaste is a strong first resort; if it’s velvety matte, proceed with extra caution—or try soap first, paste second.
Pick the Right Paste and Tools
Not all pastes are equal. Match abrasivity to your paint and tolerance for risk. Here’s a quick chooser:
| Toothpaste Type | Typical Abrasive | Indicative RDA | Best For | Notes |
|---|---|---|---|---|
| White, regular | Calcium carbonate | Low–medium (<70–100) | Most emulsion walls | Good control; gentle on eggshell/satin. |
| Whitening | Hydrated silica blends | Medium–high (100–150+) | Stubborn marks on durable paint | Higher risk of sheen change on matte. |
| Gel | Minimal abrasives | Low | Very delicate finishes | May underperform; try longer dwell, light pressure. |
| Charcoal | Carbon particles | Variable/unknown | Generally avoid | Can streak or darken pores; patch-test if tempted. |
Tool choice is equally decisive. Use a microfibre cloth for uniform contact and debris capture; a soft sponge is second-best. Avoid stiff brushes that score paint. On high-traffic skirting or gloss trim, a tiny amount of whitening paste can be safe—gloss resists burnishing better. When in doubt, lower abrasivity, lighter pressure, longer time. That mantra preserves finishes while still harnessing the physics that make the toothpaste trick work.
Toothpaste succeeds because it brings measured abrasion and mild surfactancy to a wax-and-pigment problem, excelling where pure solvents or soaps fall short. The art is in calibration: pick a low-grit paste, keep the surface just damp, and stop the very moment colour lift ceases. With that discipline, you can erase doodles without repainting—and keep the wall’s character intact. Where might you use this approach next: the hallway masterpiece, the stairwell scuff, or the rented flat’s risk zone, and which paste would you choose for your paint finish?
Did you like it?4.5/5 (23)