In a nutshell
- 🪥 Why it works: Toothpaste’s micro‑abrasives and gentle surfactants deliver a mechanical polish that lifts films fast—often revealing cleaner grout lines in seconds.
- 🧽 Step-by-step: Start on a dry surface, apply a thin bead of white, non‑gel toothpaste, scrub small sections 20–30 seconds (circles, then along the joint), wipe, rinse lightly, and dry.
- 🧰 Choosing tools: Pick plain white or baking soda pastes; avoid gels and bright colours. Use a toothbrush for precision or a grout brush for floors, plus a microfibre cloth for clean removal.
- ⚠️ Precautions: Perform a patch test on coloured grout, keep paste off natural stone (marble/limestone), go gently on silicone, wear gloves if sensitive, and ventilate.
- 🛡️ Aftercare: Apply a penetrating grout sealer once dry to slow re‑staining; plan quick weekly touch‑ups and escalate to grout cleaners or resealing if stains persist.
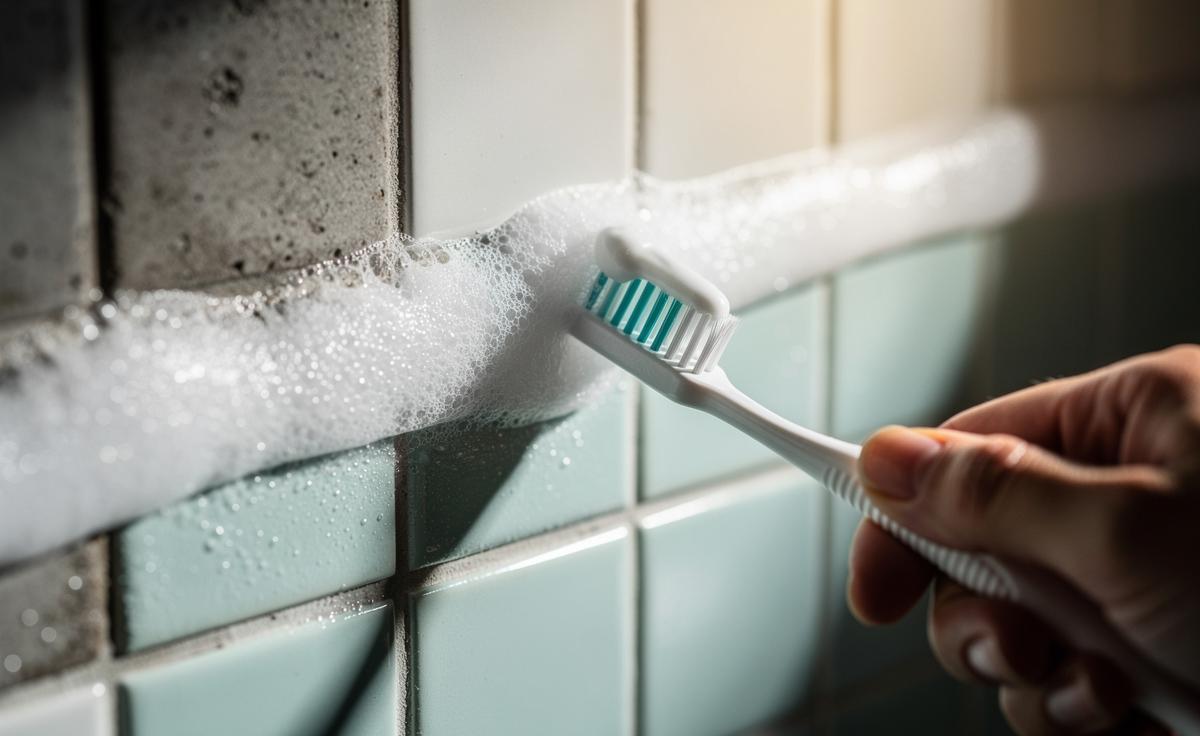
Grubby grout makes pristine tiles look tired. The fix might be sitting by your sink. Everyday toothpaste can cut through the grey film that clings to grout, lifting stains and brightening lines with surprising speed. No harsh fumes, no special kit. Just a pea-sized dab, a brush, and a brisk scrub. In many cases the dingy veil loosens in seconds, revealing the pale lines you remember. This quick trick won’t replace deep restoration, but it’s a smart first response to soap scum, tea splashes, or muddy paw prints. Here’s how it works, when to use it, and what to choose for the fastest, safest results.
Why Toothpaste Works on Grout
Toothpaste is a miniature cleaning lab. Most white pastes contain micro‑abrasives such as hydrated silica or calcium carbonate. These particles are engineered to polish enamel without scratching. On grout they act like a gentle scouring powder, knocking back surface grime, soap residue, and the dulling film that traps light. Add mild surfactants to lift oils, humectants to keep the paste workable, and a touch of flavouring, and you have a convenient cleaner that clings to vertical joints instead of running away.
Formulations with sodium bicarbonate (baking soda) introduce slight alkalinity, which helps loosen acidic stains from coffee, wine, or cooking splashes. Whitening variants may include peroxide donors that brighten without bleach, though the concentrations are modest. The effect is mechanical first, chemical second: you are polishing the grout’s surface to restore its ability to reflect light. That’s why results can pop so quickly on light soils—often visible in the time it takes to brush your teeth.
There’s another advantage: control. Toothpaste spreads in a line, holds to a joint, and wipes clean without much run-off. That makes it ideal for quick touch-ups after a shower or by the hob. Precision means less mess, less water, and less risk to adjacent finishes.
Step-by-Step Method for Fast Results
Start with a dry surface. Wipe tiles and joints so dust and loose debris don’t turn to sludge. Choose a plain white, non‑gel toothpaste—preferably one with baking soda—and an old soft or medium toothbrush. Squeeze a thin bead along the grout line. Work in small sections: one arm’s length is perfect. Short, focused sessions deliver the most dramatic “seconds‑to‑white” reveal.
Scrub using short circular strokes, then finish with straight passes along the joint to chase grime out of pores. Pressure should be firm but not aggressive. Give 20–30 seconds per line, longer for corners. If stains linger, reapply and let the paste sit for two minutes before scrubbing again. Wipe away residue with a damp microfibre cloth, then rinse lightly and dry. Drying matters: it stops mineral spots and lets you judge true colour rather than a wet darkened shade.
For textured grout or wider joints, switch to a small grout brush with stiffer fibres. For silicone seals, avoid abrasive scrubbing and use only the lightest touch. Always test a small, hidden patch first, especially with coloured grout. Wear light gloves if you have sensitive skin, ventilate the area, and keep paste off natural stone trims; abrasives can dull polished marble and limestone. If you see no improvement after two rounds, step up to a grout‑specific cleaner or consider re‑sealing.
Choosing the Right Toothpaste and Tools
The best choice is simple: stick with white, non‑gel toothpaste. Fancy colours and glitter add nothing; some can stain porous joints. Charcoal and heavy “whitening” pastes can be too gritty for delicate edges. The tool matters too. A retired toothbrush gives control, while a purpose‑made grout brush speeds work on floors. Keep a microfibre cloth handy for clean removal—paper towels tend to shred on sanded grout.
| Toothpaste Type | Best For | Avoid On | Notes |
|---|---|---|---|
| Plain white (fluoride) | Everyday surface grime | Polished marble/limestone | Balanced abrasiveness; good first choice |
| With baking soda | Tea, coffee, light kitchen films | Coloured grout (patch test) | Mildly alkaline; fast visible brightening |
| Gel or bright coloured | Not recommended | All porous grout | Low abrasives; potential tinting |
| Charcoal/extra abrasive | Rough outdoor grout only | Glazed edges, stone trims | Risk of scratching surfaces |
If your tiles are natural stone, skip toothpaste entirely and use stone‑safe cleaners. For ceramic or porcelain installations, finish a successful clean by applying a penetrating grout sealer once fully dry; this slows future staining and makes the “seconds‑to‑white” trick even faster next time. Keep a small kit—paste, brush, cloth—under the sink for swift weekly touch‑ups.
Used wisely, toothpaste is a tidy, thrifty way to rescue tired grout and refresh a room’s look between deep cleans. Results appear fast because you’re polishing the surface, not masking it, and that fresh edge line lifts the entire field of tiles. It’s not a cure‑all for deep mould or dye ingress, but it’s a brilliant first pass. Will you try a toothpaste test strip on the most visible joint, time the change, and see how close to “seconds” your space can get—or will you build a small grout‑rescue kit and make it part of your weekly reset?
Did you like it?4.6/5 (28)